
Upland Wood Flooring has been doing wood floor refinishing in Upland, CA for more than 20 years, serving surrounding cities including San Antonio Heights, Claremont, Montclair, Rancho Cucamonga and La Verne. We sand worn hardwood back to clean wood, repair what needs it, and apply a new finish that suits the floor and the household using it.
A refinish is only as good as the decisions made before the sander starts. We confirm when the house was built, measure how much wood the floor has left, and check for damage that sanding would only hide. More than half of Upland’s homes were built before 1980, so many of the floors we see have been sanded before and need careful handling.
We also plan around your household. Dust containment keeps the sanding in the rooms being worked, and a written cure schedule shows which rooms close and when they reopen, so you can plan meals, pets and work around the job.
Full Refinish or Screen and Recoat
When a Full Sanding Is the Right Job
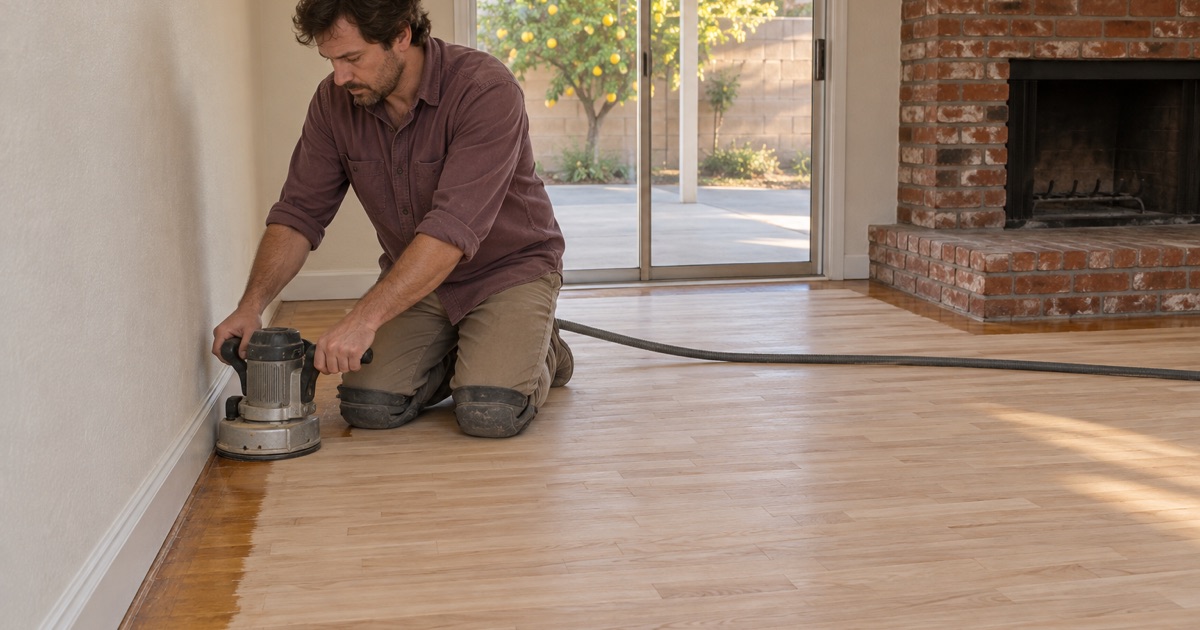
A full refinish takes the floor down to bare wood and removes everything above it: worn finish, gray traffic lanes, deep scratches, stains and old color. It is the right job when wear has reached the wood itself, or when you want a different stain color. The result is effectively a new surface on the original boards.
We work through a grit sequence with a drum sander on the field and an edger along the walls, then finish with an orbital sander or buffer to remove sanding marks. Each pass is lighter than the one before, which keeps the cut as shallow as the damage allows and saves wood for the next refinish.
When a Screen and Recoat Will Do
A screen and recoat lightly abrades the existing finish and adds a fresh coat without sanding into the wood. It suits floors that look dull or lightly scuffed but have no bare spots. It takes less time, makes far less dust and removes no wood, which matters on older or thinner floors.
The limit is adhesion. A recoat will not bond to a floor that has been waxed or treated with some polishes, and it can peel within weeks. We test the existing finish before recommending a recoat, and if it will not hold, we tell you rather than applying a coat that will fail.
Floors That Need Repair First
Some floors cannot be refinished well until they are repaired. Cupped boards, hollow spots, pet urine stains and water damage all show through a new finish. We repair or replace those boards first, matched to species and width, so the refinish covers a sound floor.
Repairs are woven into the floor rather than cut in as a square patch. New boards are staggered into the surrounding rows so their ends fall at different points, the way the original floor was laid. After sanding and finishing the whole room together, a well-woven repair is hard to find.
Checks Before the Sander Starts
Build Year and Painted Trim
The EPA RRP rule covers paint disturbed in homes built before 1978, and refinishing often reaches baseboards, shoe molding and stair trim. We confirm the build year before any sanding so we know whether that trim needs lead-safe handling. It is a simple check that prevents a serious mistake in an older house.
For a pre-1978 house, the answer changes how the room is set up. Painted trim that has to come off or be sanded is handled with lead-safe work practices, containment and cleanup, while trim that can stay in place is protected and left alone. We explain which applies before the job is scheduled.
Remaining Wood and the Engineered Wear Layer
Solid hardwood has a limit, set by the distance between the surface and the tongue. Engineered flooring has a harder limit, because only the top wear layer can be sanded. We measure both at a floor register or threshold before quoting, and if the floor cannot safely take a full sanding, we say so up front.
Insects, Moisture and Hidden Damage
Before sanding, we look for drywood termite frass, powderpost beetle holes, board gapping and moisture problems. Refinishing over any of them only hides a problem that will return. When we find one, we explain what it means and what should happen first, whether that is a treatment, a plumber or board replacement.
A moisture meter reading on suspect areas is part of every walkthrough. Boards that read wetter than the rest of the floor near a kitchen, bathroom or exterior door usually point to a leak or a drainage problem. Sanding a floor while it is still moving with that moisture leaves an uneven surface once it dries.
Stain, Finish and Sheen
Choosing a Color on Your Own Floor
Wood species decide how stain behaves. Red oak takes color readily, white oak shows more of its grain, and maple can go blotchy without careful preparation. We lay down sample patches of floor stain on your sanded boards, and where a darker color needs to take evenly, we use water popping to open the grain first.
Many owners simply want the orange tone of an aged oil finish gone. A clear waterborne finish on sanded red oak or white oak brings back a lighter, more natural look without any stain at all. We show you both options side by side before you decide.
Finishes That Meet Rule 1113
South Coast AQMD Rule 1113 sets a limit of 275 grams per liter for wood coatings in this air basin, and it applies to the products used on your floor. Every finish we use is chosen to meet it. That rules out some products sold in other states, but the compliant finishes available here perform well.
We work mainly with waterborne polyurethane, oil-modified polyurethane and hardwax oil. Waterborne finishes dry clear and fast and have a lower odor. Oil-modified polyurethane adds warmth, while hardwax oil gives a low-luster look and can be spot-repaired later without a full sanding.
Sheen Level and Everyday Wear
Sheen level changes how a floor looks and how it ages. Gloss shows every scratch and footprint, while satin and matte hide daily wear far better. Most households we work for choose satin or matte, and we can show you samples in your own light before the final coat.
The finish also sets how you maintain the floor. Polyurethane floors want a pH-neutral cleaner and an occasional screen and recoat once the surface dulls, while a hardwax oil floor is refreshed with maintenance oil. We leave written care instructions matched to the product, so the refinish lasts as long as it should.
Our Step-by-Step Wood Floor Refinishing Process
Step 1: Walkthrough and Written Scope
We inspect the floor, confirm the build year, measure the remaining wood, and test the finish. You receive a written scope listing each room, any repairs, the stairs by tread and riser, and the recommended finish.
Step 2: Containment and Protection
We move out what needs moving, seal doorways and vents, and protect cabinets and walls. Sanders run with vacuum extraction so the dust stays in the work area rather than traveling through the house.
Step 3: Repairs, Sanding and Filling
Board repairs come first, then the sanding sequence. Gaps and small defects are filled with wood filler or by trowel filling across the floor, and a final pass leaves the surface ready for color.
Step 4: Stain, Coats and Cure Schedule
Any stain goes down first, followed by the finish coats with light abrasion between them. We leave you the written cure schedule with the dates for walking, furniture and rugs, plus care instructions for the finish we used.
- 20+ Years in Wood Floors
- Build Year Checked First
- Written Cure Schedules